What The Head!? - DIY Composting Head On a Sailboat

Why Switch to Composting?
Spring is a time Celene and I start thinking about unwrapping the boat and looking forward to another summer sailing season! However, that comes with a list of boat projects that need to get done.
One of the spring boat projects we tackled this past year was replacing our marine head and holding tank with a composting head. There were several reasons for making the change and taking on this project:
1. Smell

Holding tanks stink! There's not much else to say on that. It is essentially just a container (in our case a 55L bladder) with sewage sloshing around inside, and when it's in there long enough it begins to smell. When we're not using the boat, it's locked up and doesn't get much ventilation, so the smell becomes worse and starts to attach itself to things. We learned our lesson the hard way on that last point, when after a sailing trip we left the boat at the dock, deciding not to get it pumped out because it wasn't nearly full. Well, needless to say, when we came back to the boat 2 weeks later it wasn't very nice. All the cushions had to come home and go through the wash and the interior of the boat got a good scrub with bleach. Lesson learned! From now on we would get it pumped out after EVERY use. Which brings us to our next reason for the project.
2. Pumpouts
Our marina at the time was charging $20 per pumpout. It has since gone up to $25. It doesn't matter how full or empty the tank was, the cost is per pumpout. So going back the the previous lesson learned, that meant that anytime someone uses the head we're spending $20 when we get back to the dock to get pumped out. This really isn't a deal breaker in and of itself, but stacked together with the other reasons are what made this project worthwhile.
3. Storage / Access
We have a 26' boat. It's not very big, and there's not an awful lot of storage. The two largest storage areas are under the port and starboard side settee's. Our holding tank was located underneath the port side settee. (pictured below)

55L Holding tank located beneath the port side settee
In addition to losing a significant amount of storage space (since if you wanted to actually store anything in here you had to be ok with it taking on the smell of the holding tank) this area also provided the only access to the forward bilge area, which was completely blocked off and inaccessible by the tank and sanitation hoses.

Port side settee, looking forward towards the forward bilge area
So the thought of having all that extra storage space and access to the bilge was a major plus for going ahead with the project.
4. Water
Originally, our 1978 Chrysler 26 did not come with a marine head and holding tank. It would have just had a porta-potty which is like a self contained unit that doesn't flush or require a water intake. Here's a picture of one I found online:

At some point in time the previous owner of Avalon replaced the porta-potty with a marine head and holding tank, as seen below:

Since our boat wasn't designed with this type of head, it didn't have a raw water intake that this head requires to flush it. The previous owner who installed it apparently didn't like the idea of putting a hole in the hull below the waterline, and plumbed it to the freshwater tank instead. It worked fine, but really ran through our supply of water needed for drinking and washing etc...
I did consider adding a through-hull for a raw water intake to solve this problem, but ultimately considered all the other issues together and decided to move forward with the composting head project.
Game On!

There are different types of composting heads out there and I won't go in depth on what they all are since there are plenty of other articles already written on the subject. I went with a urine separating style composting head. Which, basically just means that the liquids are separated from the solids.
Separating the liquids form the solids is important since sewage is created when the two are combined. Keeping them separate prevents the production of sewage thus preventing smells. The liquids are diverted into a separate container in front and the solids are deposited into a bucket containing a compost medium (in our case peat moss) which helps to dry it out and break it down into compost.
There are several popular manufacturers of this type of composting toilet but the problem is, there fairly expensive and bulky. So I decided to build my own that could be custom fitted to the space in our boat.
I built the housing out of plywood and used some manufactured DIY composting toilet components from www.kildwick.com
Below are the components that I used:

Kildwick Klassik urine separator
Kildwick Klassik urine separator
Kildwick solid tank for composting toilets
Kildwick Urine Container
Kildwick Spillguard Kit
Kildwick Spillguard Kit
The Build

These components all come from Europe, and I ordered them all at the height of the COVID-19 lockdowns in early 2020, so I had to go ahead with building the housing with only the dimensions of the components given on the website.
Once I had the old head removed, I started by measuring and drawing out where the liquids and solids bucket would go, then masking out the dimensions of the housing around them.
The design is fairly simple. The centre houses the liquid and solids containers, and there's a storage bin for peat moss on one side and garbage on the other, with spots to place your feet in front.

Once I had the plan figured out I started building out the housing with 3/4" birch plywood.

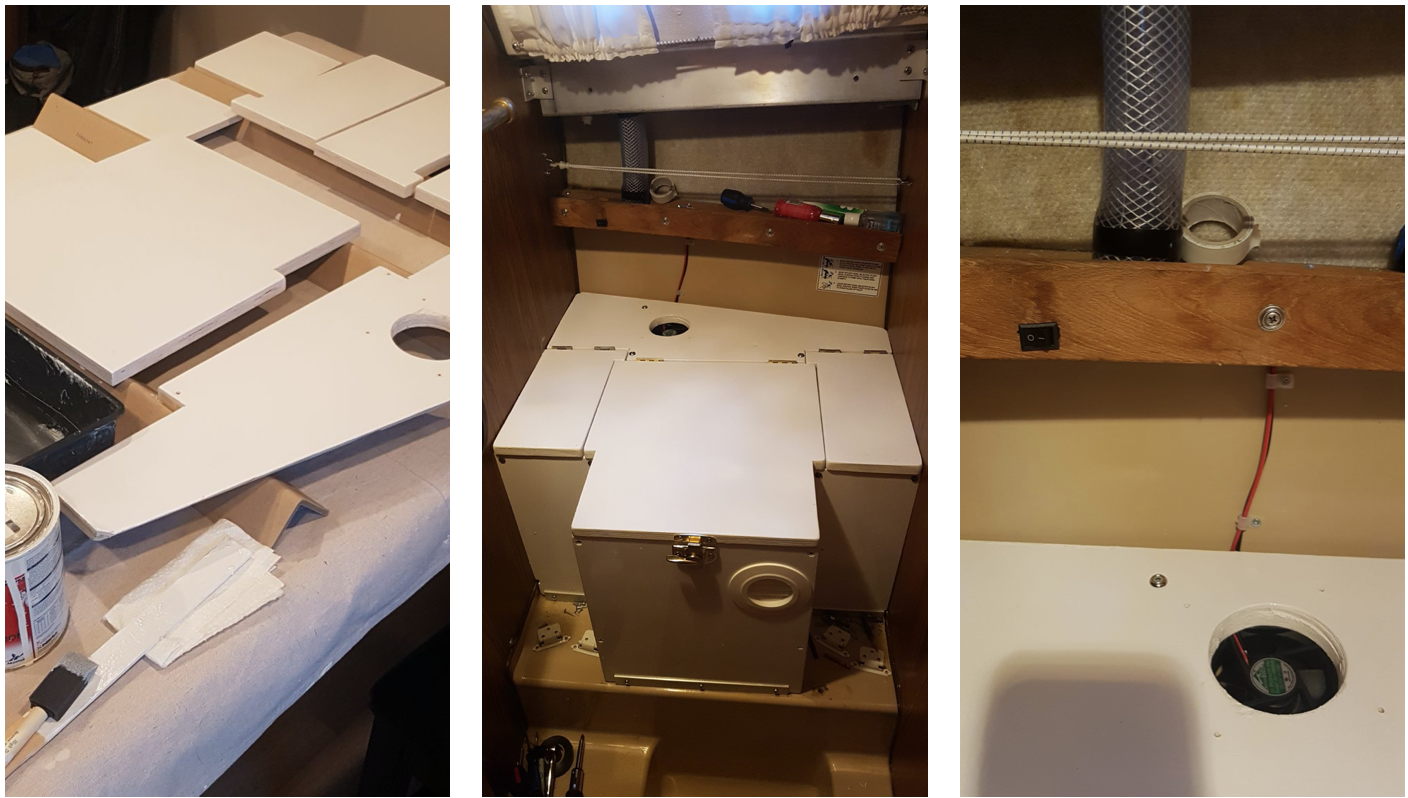
I took it all apart and painted it with some polyurethane paint I had left over from a previous project.
The 12v fan in the rear, and the intake vent in the front maintains Negative pressure ventilation to the outside, eliminating all odours.
I installed the switch for the fan in the teak trim above it and the exhaust hose attaches to the old pumpout fitting.


At this point everything was painted and trimmed out and installed in the boat. My package finally arrived from Europe with the components needed to finish the project. I used the included template to cut the hole for the diverter
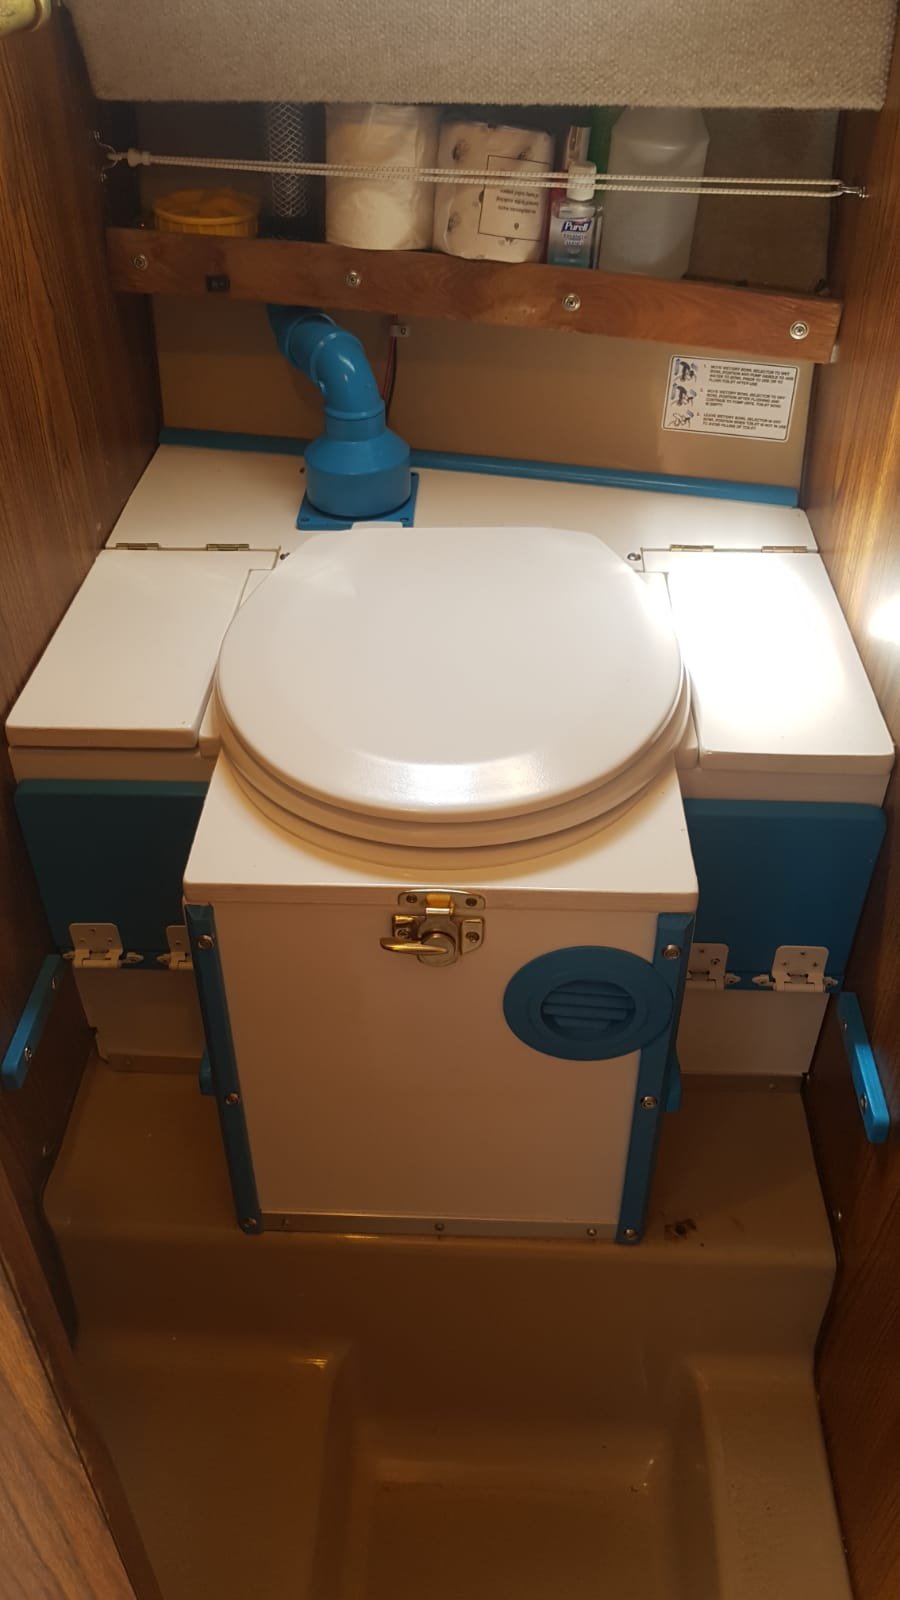
All that was left to do was attach the diverter to the top, install a toilet seat and drop in the containers.


Conclusion
We've spend a whole season now using the boat with the new head, and so far it's been great. There has been no smell, we no longer have to go to the service dock and pay for pumpouts, the extra storage space has been a significant improvement and our water supply lasts much longer now that we're not just pumping it into a holding tank.
Have you considered switching to a composting head in your boat? If so, I hope this article is helpful.
Please let us know in the comments below!