Ice Ice Baby - Avalon Gets a New Ice Box!

Our new icebox on Avalon. It was a project I've wanted to do for a couple years.
I was off work all spring due to Corona virus so I had some time on my hands, and based on the weather we had this spring it didn't look like we were getting the boat in the water anytime soon, so I decided to take on a couple big projects i've been thinking about for the last few years.
Why I Wanted to do This Project
Like I said, I've had the idea in me head for this project for a couple of years, but since it was kind of a larger, time consuming project, and it wasn't absolutely necessary I never actually considered doing it until now.
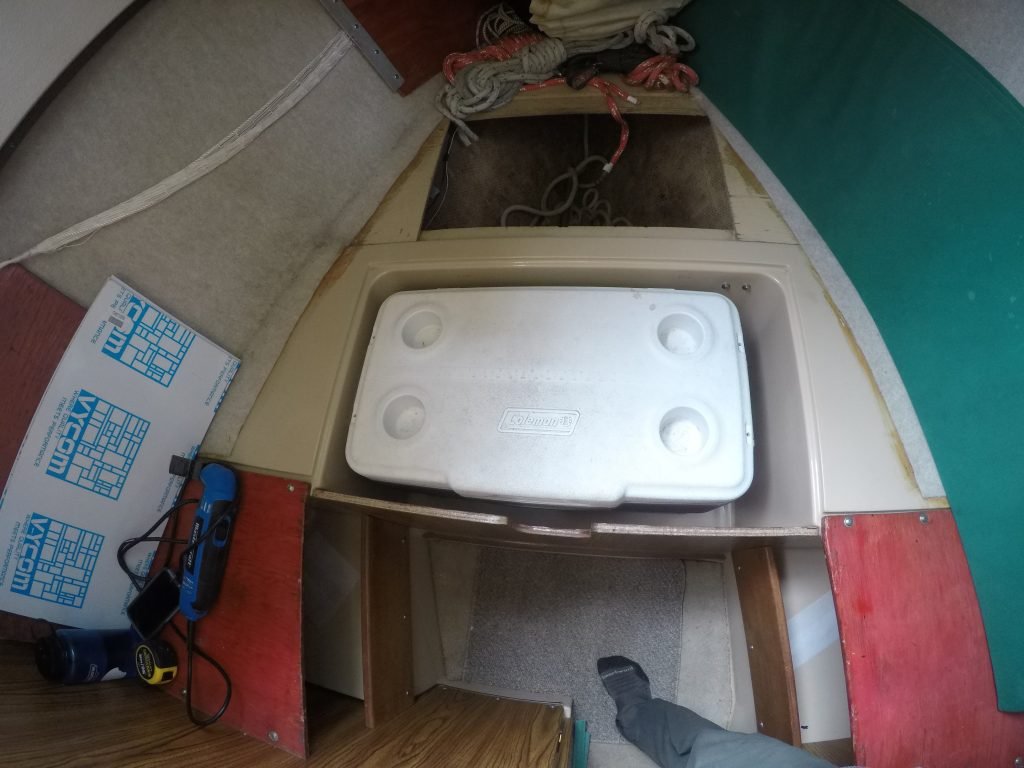
Prior to this we had a cooler which fit in a molded compartment under the V-Berth.

Previous setup with cooler
The problems with this arrangement were that as you can see in the photo, the cooler didn't completely fill the space, nor could we expect to find one the would fit it exactly. The cooler was also slightly too tall to be able to put a plywood cover overtop so as to sit flush with the rest of the V-Berth. So that meant that the cushion would go directly on top of the cooler and any weight placed on the edges would fall through those open spaces between the cooler and the edge of the opening. It wasn't a total deal breaker but we found it very annoying. That, and I have a hard time coming to terms with inefficient uses of space. The other issue was once all the ice melted I had to lift that big cooler out and carry it through a narrow corridor and up the companionway to dump the water out.
I was pretty certain that behind that molded fibreglass liner was a lot of wasted space and that a properly constructed and insulated icebox would be much more functional and convenient for us.
Here's a few more "before" shots of what the space looked like originally.


I started off by cutting a large hole in the centre so see how much space I had underneath.

Looking down the hole, there's about 10" of space to the bottom of the hull

This is in the hole looking aft at the bilge area beneath the head.
As I suspected there was lots of unused space on the sides and underneath this area.


Next I began to build in the structure to frame in the new icebox using birch plywood and some 2" x 2"


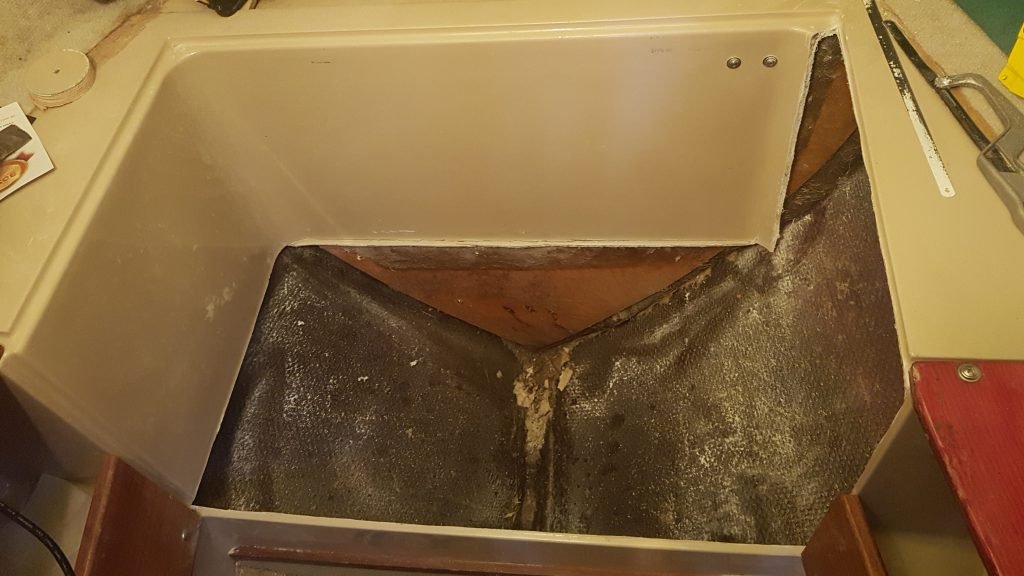
Next, I began cutting the polystyrene insulation to fit on the bottom and sides. There's 4" of foam on the sides and bottom and 2" in the lid. The forward end of the space is a structural bulkhead so obviously I couldn't cut into that, so I decided to insulate the back side of that bulkhead in order to maximize space inside the icebox. I bought sheets of 1/4" PVC for the icebox liner which came in 12" x 24" sheets, so those are the dimensions I used for the actually workable space of the icebox.

All the foam and the PVC sheets dry fitted. The forward side only has 1/2" of foam on this side of the bulkhead with another 4" of foam on the other side

4" of foam on the forward side of that bulkhead, looking in the anchor rode storage space

I through bolted a sheet of 1/4" birch over the foam to protect it from getting all banged up

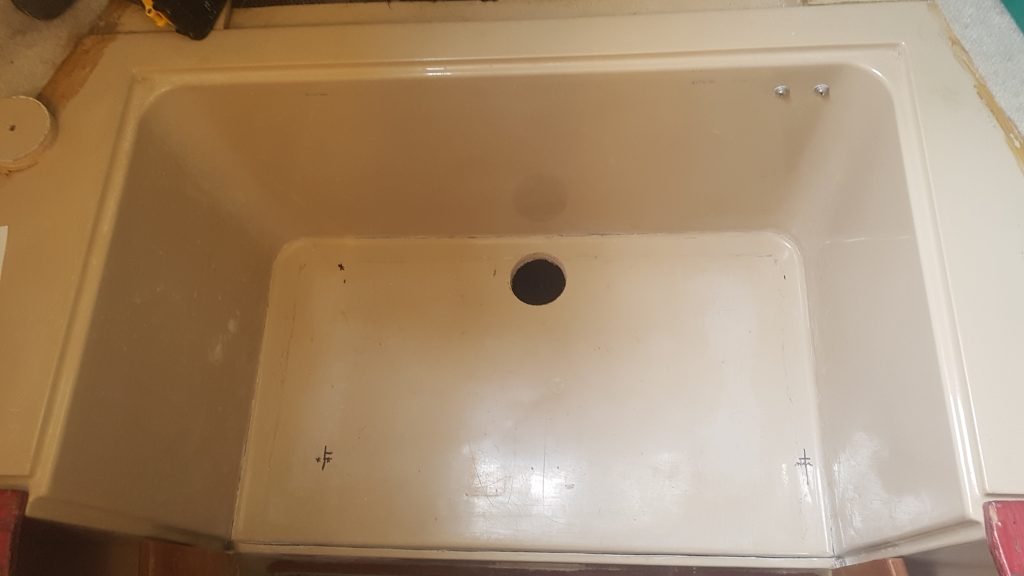
Once it was structurally solid and well insulated I put together the PVC liner. I glued it together with PVC cement, then fibreglassed the outside corners to give it some extra strength. The bottom is sloped on both axes so that melted ice water flows toward the drain which is plumbed to the aft bilge area and pumped out with the bilge pump.


Yes, the glass is a little ugly as this was my first attempt at any fibreglass work

Prior to installing the liner I siliconed all the inside corners and water tested it to ensure it didn't leak
The top is made of 2" foam insulation lined with more 1/4" PVC, then covered with aluminum HVAC tape and finished with a sheet of epoxied 1/2" birch plywood.


The lid is made in the same manner as the top with 1/2" birch plywood, 2" foam and 1/4" PVC covered with aluminum tape. Lastly, there's 1/2" closed cell foam window gasket around the outside which fits in a 1/4" deep recess in the top.


I dressed up the front with some 1/4" oak plywood stained with black walnut danish oil and some purple heart I had left over from a previous project oiled with teak oil.


Conclusion
The finished product turned out quite nice. It solved all the problems listed above with the old setup. We have significantly more space in the new icebox than we did with the old cooler. The interior dimensions are 12" x 12" x 24" or 56.6 litres, which can hold about 85 cans of beer (if there were no ice). Our V-Berth is now flat with no holes to fall into, and the melted ice drains nicely into the bilge where it's pumped overboard.

